A noisy garage door can be more than just annoying—it’s often a sign that your rollers are worn out. Luckily, replacing them is a simple job that, with the right method, can take as little as five minutes.
In this step-by-step guide, Stephen from Garage Gecko University shows how he replaced a customer’s loud, beat-up rollers—earning a five-star review and a viral shoutout in local Facebook groups.
Start with Smart Setup
Before you even touch the track, make your life easier with a proper setup. This saves time, prevents frustration, and keeps everything within reach.
Quick Prep Checklist:
Set your ladder close to the garage door
Place new rollers on top of the ladder
Raise the door to the open position
Watch the Joint Between Tracks
“You’ll notice the door gets caught where the horizontal and vertical tracks meet. That sharp corner was tearing up the rollers.”
Pro Tip: Use pliers to gently bend out the joint where the tracks meet—but don’t overdo it, or your rollers might pop out later.
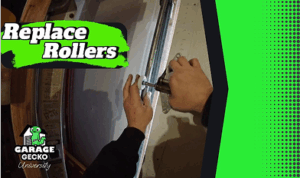
Remove and Replace the Rollers
The process is straightforward: open the track just enough to remove each roller, then slowly lower the door to access and replace them one by one.
Step-by-Step:
Use a pry bar to lower the door one roller at a time
Pull the old roller out at each exposed opening
Leave the second-to-last roller out (this is key!)
Why You Leave One Roller Out
“You can’t get the bottom roller in if that second-to-bottom one is already in place. Leave it out until the very end.”
Pro Tip: Keep your right leg close to the door during removal. The bottom bracket is under tension—it can kick back if you’re not ready.
Reinstall the New Rollers
With four out of five rollers replaced, raise the door slightly and install the new ones by hand.
Installation Tips:
Push each pin into the opened track slot
Secure rollers one at a time as the door rises
Leave enough room for inserting the bottom roller last
Handling the Top Roller
“For the top roller, go around to the back and twist and pull the top of the track out—the roller will just pop out.”
Pro Tip: Use your opposite hand behind the pin to guide the new roller in. It helps with speed and accuracy.
Don’t Forget to Close the Track
After swapping rollers, don’t overlook this critical step—closing the track.
Final Track Checks:
Close each section of track you opened
Double-check before switching sides
Open tracks = rollers that pop out = customer callbacks
Repeat on the Other Side
“Set up just like the first side—about 6 to 8 inches down from where the horizontal meets the vertical track—and repeat the process using your pry bar.”
Bonus Tip: Check Your Hinges
While replacing the rollers, Stephen spotted something unrelated to noise but just as serious: a hinge installed upside down.
Hinge Reminders:
Make sure hinges face the correct direction
Incorrect hinge orientation can cause binding
Don’t overtighten screws—you’ll strip the panel
Avoid Future Problems
“A backwards hinge can cause the door to bind. And don’t over-torque tech screws—they’ll strip out the panel fast.”
Pro Tip: Just give screws a light trigger pull. Tight is good. Overtight is trouble.
Fast, Safe, and Professional
With a simple ladder setup, a few basic tools, and a smart technique, you can replace garage door rollers quickly and safely. Stephen’s method avoids extra disassembly, keeps you in control of the door, and makes you look like a pro.
Looking to level up your skills or start your own business? Check out Garage Gecko University for step-by-step courses, tool recommendations, and real-world training from seasoned techs like Stephen.
Be sure to like, subscribe, and stay tuned for the next field-tested tutorial.